On 4 December 26 people met at the Whitehorse Art Space in Box Hill Town Hall to attend the final IMUG meeting for the year. Those present came from diverse organisations including galleries, school archives, museums, historical societies and specialist research libraries illustrating the range of smaller organisations using DB/TextWorks. Three people travelled from Daylesford to attend the meeting.
Jacquie and Gillian were our hosts and started the proceedings by showing us around the exhibition space and providing a brief history of the establishment of the collection. The main collection consists of 1,300 plus artworks - paintings, photographs, ceramics, textiles. Most of the items have been donated since 1927. The Box Hill area has a strong connection to the history of Australian art and this is reflected in the collection. From 1885 to 1888 Tom Roberts and other artists established an artists' camp at Box Hill so they could paint the surrounding countryside. Among the paintings in the Whitehorse Art collection are works by some of these artists including Tom Roberts, Frederick McCubbin and Arthur Streeton as well paintings by E Phillips Fox. The collection also includes modern works from local artists.
In the meeting room Gillian and Jacquie spoke about
cataloguing the collection and why they like using the software, primarily because it is user-friendly. It also is useful to be able to create report forms showing information plus an images for selected items. As well as the database for the art collection there is a database recording long term loans, a memorabilia database and a database recording items in the small library collection. Art works are displayed in a number of locations and an inventory of the collection is taken every year.
As well as the opportunity to visit a variety of collections, IMUG meetings provide the opportunity for general discussion on any topic related to using databases and cataloguing and managing collections. Backing up databases, merging databases, using a mask in the number field and cataloguing digital items were some of the topics discussed at this meeting with comments and solutions being shared by those present. Networking continues over a cup of tea or coffee and, at this meeting, delicious muffins.
Jacquie then showed us the art storage area including some of the items not on display while Robyn, from Box Hill Historical Society who also use DB/TextWorks, showed people the local history rooms. Many thanks to Jacquie, Gillian and Robyn for making this an extremely informative and interesting meeting.
Additional information about the Whitehorse Art collection:
City of Whitehorse Art Collection
Whitehorse Art Space
Showing posts with label DB/TextWorks. Show all posts
Showing posts with label DB/TextWorks. Show all posts
Wednesday, December 4, 2013

Monday, November 12, 2012
Editing databases 3
- 5. to check for the use of multiple terms in a field if the data is to be transferred into another database structure where only one term is allowed in a field
- The next stage in the life of the regional database on the library website is to transfer the records as a subset of the library catalogue. In order to do this the information in some of the fields needed to be edited.
In DB/TextWorks databases multiple terms can be added to a field using the F7 key to separate each term. Consequently the data structure created for the local history database had just the one field for Title and one field for Author. The MARC records used in the library catalogue required only one title in the Title field and one Author in the Author field with an additional field for Added Authors.
It was therefore necessary to check for records that had more than one title or multiple authors. To do this I created a series of report forms (Display menu, Design Form, then choose Blank Form) with one box for the Accession Number and the second box for Title or Author for example. In this second box I made sure that the 'make each item or entry a paragraph' option was used.


Friday, November 9, 2012
Editing databases 2

This can easily be corrected by viewing the record in the Edit form and backspacing where the spaces caused by the use of the Enter key occur.

We encountered this issue in the library when IT decided to publish the local history databases online using MySQL. Any records where the Enter key had been used were rejected and unlike DB/TextWorks which informs you when records are not imported the library online database didn't.
One way to check for the use of the Enter key in a group of records is to export a set of records, view the export file in Notepad and use the Find feature (under the Edit menu) to locate the > symbol which appears when the Enter key has been used.

Another way would be to make the alterations in the Notepad file and then import the file back into the database, making sure that the the changed records replaced the existing records.
Thursday, November 8, 2012
Editing a database
No matter how careful you are when entering data it may be necessary to edit the database records.
Database records are edited:
F3 key
In DB/TextWorks databases placing the cursor in any of the field on the Search Screen and then using the F3 key will give you a list of all the entries or terms in that field. Scrolling down the list usually shows any inconsistencies that require attention.

If the Search Screen does not contain a field you want to search, either go to the Select Query Screen icon (fourth icon from the left) and choose Basic Query Screen which contains all the fields in the database
or select the Add Query Box icon (third icon from left)


Database records are edited:
- to maintain consistency of information in fields
- to correct misspelling of words or terms that need to be altered
- to ensure that the F7 key (and not the Enter key) has been used when an additional term is added to a list, for example in Subjects
- to remove spaces in records caused by use of the Enter key, particularly after data has been entered in a field leaving spare lines in the report and display forms
- to check for the use of multiple terms in a field if the data is to be transferred into another database structure where only one term is allowed in a field
- to check for multiple versions of a record to merge if information from other sources has been added to the database, for example if information from different sources has been entered initially in Excel and then transferred into the database
F3 key
In DB/TextWorks databases placing the cursor in any of the field on the Search Screen and then using the F3 key will give you a list of all the entries or terms in that field. Scrolling down the list usually shows any inconsistencies that require attention.

Examples of instances where editing may be required:
Example 1 - Error in entering data
After using the F3 key in the Accession / Registration Number field the list showed
1 B
1 7065
1 B0001
1 B0002
The entries for B and &7065 needed to be corrected
Example 2 - Misspelling
After using the F3 key in the Subjects field the list showed
10 Australian Tessallated Tile Co
29 Australian Tessellated Tile Co
Batch Modify option was used to correct the misspelling of Tessellated
Example 3 - Using Enter key instead of F7 for a new term
After using the F3 key in the Subjects field the list showed
1 Schools Churches Hotels
The entry was corrected by placing the cursor in front of the second and subsequent terms and then using the F11 key
Example 6 - Merging data from several records in one field
For one project information about people originally recorded on a number of Excel spreadsheets was imported into a database. A search under Name showed that, in some cases, there were multiple records for the same person.
4 Smith, John
2 Smith, Thomas
Once the multiple records for each name were identified, relevant information from some fields was cut and pasted into one record the the person. Once this was done the records no longer required were deleted.
Basic Query Screen or Add Query BoxIf the Search Screen does not contain a field you want to search, either go to the Select Query Screen icon (fourth icon from the left) and choose Basic Query Screen which contains all the fields in the database
or select the Add Query Box icon (third icon from left)

and then select the field required.

This will produce a temporary field box on the Search Screen until the database is closed.
Once the items to be edited have been located, records can be edited individually or if the same change needs to be made to a term in the same field for a group of records then the changes can be made using Batch Modify.
Batch Modify
Once the records to be edited have been selected, go to the Records menu and choose Batch Modify.

Select the field to modify and then select how the set of records will be modified. In the above example Substitute Entry is the operation chosen while Matching is selected in the Affects column. The existing term is typed in the Old Entry box while the new term is typed in the New Entry box. Click OK, read the information in the next box that comes on the screen and if the information is correct click the OK button.
Additional examples of Batch Modify
More information about editing databases in subsequent posts.
Monday, March 21, 2011
DB/TextWorks manuals
While looking for something else on the andornot blog I also found the following information on manual for those with recent copies of DB/TextWorks -
http://www.andornot.com/blog/post/DBTextWorks-Manuals.aspx
The andornot website and blog - http://www.andornot.com - is a useful resource to bookmark if using DB/TextWorks software.
http://www.andornot.com/blog/post/DBTextWorks-Manuals.aspx
The andornot website and blog - http://www.andornot.com - is a useful resource to bookmark if using DB/TextWorks software.
Wednesday, November 4, 2009
DB/TextWorks versions
The most recent version of DB/TextWorks is version 12 (2009).
Maxus website contains a list of the features added to each new version of DB/TextWorks from version 3 to the latest version. The first version of DB/TextWorks was version 2.
http://www.maxus.net.au/features.htm
Maxus website contains a list of the features added to each new version of DB/TextWorks from version 3 to the latest version. The first version of DB/TextWorks was version 2.
http://www.maxus.net.au/features.htm
Sunday, November 1, 2009
DB/TextWorks and Vista
Later versions of DB/TextWorks - versions 11 and 12 - should run on Vista with minimum problems.
The following posts may help.
Installation
Windows Vista users may need to right–click on the DBTextWorks exe file and select "Run as Administrator" to install the software.
How to Install Inmagic DB/TextWorks on Vista
http://www.andornot.com/about/developerblog/2007/06/how-to-install-inmagic-dbtextworks-on.aspx
Storing Files
A warning not to install database files in the Programs folder - set up a new folder for storing database files. This has always been the recommended practice but it is important to ensure that this is done when using Vista:
Inmagic DB/TextWorks and Vista Virtualization - http://www.andornot.com/blog/post/Inmagic-DBTextWorks-and-Vista-Virtualization.aspx
Help
Unfortunately the Help function does not automatically work in Vista. The following may rectify the problem.
Textbase Help Won't Work in Vista
http://www.andornot.com/about/developerblog/2007/04/textbase-help-won-launch-on-vista.aspx
Error Opening the .CHM Help File in Vista
http://support.inmagic.com/dbtw-wpd/exec/dbtwpub.dll?AC=GET_RECORD&XC=/dbtw-wpd/exec/dbtwpub.dll&BU=http%3A%2F%2Fsupport.inmagic.com%2Fsupbase3.htm&TN=kbase&SN=AUTO12261&SE=1262&RN=0&MR=20&TR=0&TX=1000&ES=0&CS=1&XP=&RF=Brief+by+TITLE&EF=&DF=Full+Article&RL=0&EL=0&DL=0&NP=2&ID=&MF=&MQ=&TI=0&DT=&ST=0&IR=585&NR=0&NB=0&SV=0&BG=&FG=&QS=&OEX=ISO-8859-1&OEH=ISO-8859-1
Compatibility Mode
In Vista older programs may run using XP Compatibility Mode. In theory if it worked in XP it should operate using this option.
Using Windows 7 or Vista Compatibilty Mode
http://www.howtogeek.com/howto/windows-vista/using-windows-vista-compatibility-mode/
The following posts may help.
Installation
Windows Vista users may need to right–click on the DBTextWorks exe file and select "Run as Administrator" to install the software.
How to Install Inmagic DB/TextWorks on Vista
http://www.andornot.com/about/developerblog/2007/06/how-to-install-inmagic-dbtextworks-on.aspx
Storing Files
A warning not to install database files in the Programs folder - set up a new folder for storing database files. This has always been the recommended practice but it is important to ensure that this is done when using Vista:
Inmagic DB/TextWorks and Vista Virtualization - http://www.andornot.com/blog/post/Inmagic-DBTextWorks-and-Vista-Virtualization.aspx
Help
Unfortunately the Help function does not automatically work in Vista. The following may rectify the problem.
Textbase Help Won't Work in Vista
http://www.andornot.com/about/developerblog/2007/04/textbase-help-won-launch-on-vista.aspx
Error Opening the .CHM Help File in Vista
http://support.inmagic.com/dbtw-wpd/exec/dbtwpub.dll?AC=GET_RECORD&XC=/dbtw-wpd/exec/dbtwpub.dll&BU=http%3A%2F%2Fsupport.inmagic.com%2Fsupbase3.htm&TN=kbase&SN=AUTO12261&SE=1262&RN=0&MR=20&TR=0&TX=1000&ES=0&CS=1&XP=&RF=Brief+by+TITLE&EF=&DF=Full+Article&RL=0&EL=0&DL=0&NP=2&ID=&MF=&MQ=&TI=0&DT=&ST=0&IR=585&NR=0&NB=0&SV=0&BG=&FG=&QS=&OEX=ISO-8859-1&OEH=ISO-8859-1
Compatibility Mode
In Vista older programs may run using XP Compatibility Mode. In theory if it worked in XP it should operate using this option.
Using Windows 7 or Vista Compatibilty Mode
http://www.howtogeek.com/howto/windows-vista/using-windows-vista-compatibility-mode/
Sunday, July 26, 2009
Linking to audio file from database record - method 2
Earlier posts showed a method of creating a html page containing links to audio files in a folder on the computer and linking this file to a record in DB / TextWorks.
There is another way to create a link from the database record to an audio file on a computer so that when the link in the display form is clicked the audio file will play automatically. This method uses the UNC path to link to audio files and video files.
The initials UNC stand for Uniform Naming Convention. Instead of describing the location of a file or directory by drive letter, the Network Group will use a UNC path to describe the actual location of a file or directory. A UNC path is specific and applies to all operating systems.
Step 1
Locate the folder containing the audio files on the computer using My Computer or My Documents
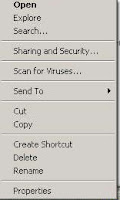 Click the folder using the right button on the mouse
Click Sharing and Security
In Network Sharing and Security section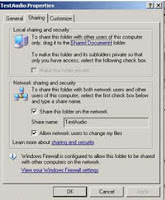
(Even though the computer may be stand alone this needs to be done)
Tick Share this folder on the network box
Enter the name of the folder to be shared eg TestAudio
Tick Allow network users to share my files
Click OK
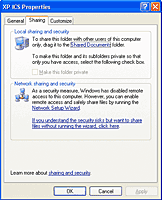
NB If the above options are not available and the screen looks like the one on the left, click the link in this section for information about understanding the risks of file sharing to enable this function.
If you only want to enable file sharing just choose the file sharing option instead of the Network Setup Wizard.
Once the sharing of files has been enabled repeat the above steps to enable the contents of the folder to be shared.
See How to configure file sharing on a Windows XP computer
To locate the computer name:
NB: This method was tested using the Windows XP operating system.
There is another way to create a link from the database record to an audio file on a computer so that when the link in the display form is clicked the audio file will play automatically. This method uses the UNC path to link to audio files and video files.
The initials UNC stand for Uniform Naming Convention. Instead of describing the location of a file or directory by drive letter, the Network Group will use a UNC path to describe the actual location of a file or directory. A UNC path is specific and applies to all operating systems.
Step 1
Locate the folder containing the audio files on the computer using My Computer or My Documents
 Click the folder using the right button on the mouse
Click Sharing and Security
In Network Sharing and Security section

(Even though the computer may be stand alone this needs to be done)
Tick Share this folder on the network box
Enter the name of the folder to be shared eg TestAudio
Tick Allow network users to share my files
Click OK

NB If the above options are not available and the screen looks like the one on the left, click the link in this section for information about understanding the risks of file sharing to enable this function.
If you only want to enable file sharing just choose the file sharing option instead of the Network Setup Wizard.
Once the sharing of files has been enabled repeat the above steps to enable the contents of the folder to be shared.
See How to configure file sharing on a Windows XP computer
Step 2
Either create a database for audio files or add an additional field to the data structure in an existing database to contain the UNC path.- When entering the filename in the record, the syntax to use is:
- Make sure that the field with the link appears in the Display report form.
- To listen to the audio file, click the link in the Display report form.
To locate the computer name:
- Locate the My Computer icon
- Click the My Computer icon using the right button on the mouse
- Click Properties
- Select Computer Name tab
To locate the exact UNC path for the folder:
- Click My Computer icon
- Click the My Network Places Link
- Click the required folder using the right button on the mouse
- Click Properties
NB: This method was tested using the Windows XP operating system.
Saturday, July 11, 2009
Linking to an audio file
A request was made at an Inmagic Museum Users Group meeting about the ability to play an oral history audio file directly from a link in a database record.
This can be done by following the steps in the previous post, Linking to files from database record, and linking to a html file stored in the same folder as the audio files are stored. The html file would either contain information about a particular audio file including the code- a href="nameaudiofile.mp3" Play audio file followed by /a or contain a list of audio files with the code linking to the audio file for each item.
The link provided would look like Play audio file
An example page for a list of audio files might be
Ron Smith recounts memories of attending Smithville Primary School during the 1930s
Play audio file
Ellen Brown recounts her days as postmistress in Smithville
Play audio file
NB links in above section are not functional links
When the html page and the audio file are in the same folder or the path to the audio file is included if in a different folder, clicking on the link will start the playing of the audio file.
Example of sample code for html page
NB. The above will only work if
1. there is a built in media player on the computer and
2. there is an internet browser installed (there does not have to be an internet connection).
This can be done by following the steps in the previous post, Linking to files from database record, and linking to a html file stored in the same folder as the audio files are stored. The html file would either contain information about a particular audio file including the code
The link provided would look like Play audio file
An example page for a list of audio files might be
Ron Smith recounts memories of attending Smithville Primary School during the 1930s
Play audio file
Ellen Brown recounts her days as postmistress in Smithville
Play audio file
NB links in above section are not functional links
When the html page and the audio file are in the same folder or the path to the audio file is included if in a different folder, clicking on the link will start the playing of the audio file.
Example of sample code for html page
NB. The above will only work if
1. there is a built in media player on the computer and
2. there is an internet browser installed (there does not have to be an internet connection).
Linking to files from database record
This example is using a DB/TextWorks database but there should be ways to also do this in other databases.
As well as being able to link database records to images, DB/TextWorks has the ability to link from a field in a database to another file such as a word document, spreadsheet, html file etc.
A number of steps are required:
1. To activate the facility to create the link
Open DB/TextWorks and go to the Tools menu then select Options and then Display.
Tick the box Detect URLs, EMail links, etc. and convert to hypertext links then click OK
2. A field needs to be added to the database to include the link directly to a word document, spreadsheet, pdf , html file etc which will open in a new window.
In the data structure include a field called (for example) File Name. It is a normal text field.
Go to the Maintain menu, select Edit Textbase Structure then Edit Fields
Type the name of the new field (for example) File Name and then click Add. Use the Close button to close the box and then OK.
3. If basic forms are not being used it will be necessary to alter edit and display forms to include the new field.
Go to the Display menu and then select Design form. Choose the form to be altered.
Click Add form box icon, select the name of the required field (for example) Field Name and then click the Add button
When designing the Display report form added text is required
Display - Form Designer - click required field eg Field Name - Tools - Box Properties - Format - Added Text - In the Beginning text box type file:// then click Apply
5. In the Edit form, if linking to an item is required, put in the full path to locate the item - C:\database\test.doc
6. View the record in the display form.
The result is that the display report form then allows the inclusion of a link to the required document in a new window.
The Maxus website contains a technical tip providing information on Live Hypertext Links in DB/TextWorks which also refers to linking to documents etc.
As well as being able to link database records to images, DB/TextWorks has the ability to link from a field in a database to another file such as a word document, spreadsheet, html file etc.
A number of steps are required:
1. To activate the facility to create the link
Open DB/TextWorks and go to the Tools menu then select Options and then Display.
Tick the box Detect URLs, EMail links, etc. and convert to hypertext links then click OK
2. A field needs to be added to the database to include the link directly to a word document, spreadsheet, pdf , html file etc which will open in a new window.
In the data structure include a field called (for example) File Name. It is a normal text field.
Go to the Maintain menu, select Edit Textbase Structure then Edit Fields
Type the name of the new field (for example) File Name and then click Add. Use the Close button to close the box and then OK.
3. If basic forms are not being used it will be necessary to alter edit and display forms to include the new field.
Go to the Display menu and then select Design form. Choose the form to be altered.
Click Add form box icon, select the name of the required field (for example) Field Name and then click the Add button
When designing the Display report form added text is required
Display - Form Designer - click required field eg Field Name - Tools - Box Properties - Format - Added Text - In the Beginning text box type file:// then click Apply
5. In the Edit form, if linking to an item is required, put in the full path to locate the item - C:\database\test.doc
6. View the record in the display form.
The result is that the display report form then allows the inclusion of a link to the required document in a new window.
The Maxus website contains a technical tip providing information on Live Hypertext Links in DB/TextWorks which also refers to linking to documents etc.
Monday, June 30, 2008
IMUG meeting June 2008
The first Inmagic Museum Users Group meeting for 2008 was held on Wednesday 11 June at the Royal Historical Society of Victoria. The theme for the meeting was using images with DB/TextWorks.
Barbara introduced the session by taking a photo using a digital camera, transferring the image to the computer and then linking the image to a record in DB/TextWorks. Susan Oliver from Werribee Park and Werribee & District Historical Society told the group about projects, undertaken at those organisations, to attach images to their catalogue records.
 Approximately 40 people attended the meeting and there was much discussion about scanning and projects during the session as well as networking opportunities before and after the meeting. Networking is an important feature of IMUG meetings. In the photo Rod and Ted are busy sharing information.
Barbara introduced the session by taking a photo using a digital camera, transferring the image to the computer and then linking the image to a record in DB/TextWorks. Susan Oliver from Werribee Park and Werribee & District Historical Society told the group about projects, undertaken at those organisations, to attach images to their catalogue records.
 Approximately 40 people attended the meeting and there was much discussion about scanning and projects during the session as well as networking opportunities before and after the meeting. Networking is an important feature of IMUG meetings. In the photo Rod and Ted are busy sharing information.
Those present also had the opportunity to visit the images room at the RHSV where David showed the equipment used and some of the recently scanned images.
In her talk Barbara spoke about resolution and compression of images and different file formats. She showed how to link the image by typing the path to where the image is stored on the computer (or elsewhere) into the image field in the edit form. In the discussion a number of people said that when adding images to a batch of records they copied and pasted the path into the image field and just changed the name of the image.
From version 4 onwards it is also possible to scan a photograph and link the scanned image to the record dirctly from the database. Click in the image box on the Edit screen, go to the Records Menu and select Scan Image then follow the prompts. When the image is scanned and stored the path is added automatically to the record.
Another tip that Barbara gave us was that it is possible to specify the drive where images are stored so that the database will automatically check the drives nominated to locate the image and the drive does not have to be added in the path. This feature can be found by going to the Tools menu, select Options, select Imaging, then in the Image drives box type the letter of each drive where images are stored. Click OK to complete the action. There is additional information about this in the Imaging Tab (options) in the Help index under Image drive and path.
Barabara also showed how to add a picture box to any report form in order to view the image with the record.
The Help in DB/TextWorks is acually helpful. Searching for Image in the index should answer most questions about using images with the database.
At the end of the session Barbara showed how to make a simple lightbox for reducing the shadows and improving the quality of images when photographing small items. How to create an inexpensive photography lightbox and Do it yourself lightbox are two of the many articles available online on this topic.
In her talk Barbara spoke about resolution and compression of images and different file formats. She showed how to link the image by typing the path to where the image is stored on the computer (or elsewhere) into the image field in the edit form. In the discussion a number of people said that when adding images to a batch of records they copied and pasted the path into the image field and just changed the name of the image.
From version 4 onwards it is also possible to scan a photograph and link the scanned image to the record dirctly from the database. Click in the image box on the Edit screen, go to the Records Menu and select Scan Image then follow the prompts. When the image is scanned and stored the path is added automatically to the record.
Another tip that Barbara gave us was that it is possible to specify the drive where images are stored so that the database will automatically check the drives nominated to locate the image and the drive does not have to be added in the path. This feature can be found by going to the Tools menu, select Options, select Imaging, then in the Image drives box type the letter of each drive where images are stored. Click OK to complete the action. There is additional information about this in the Imaging Tab (options) in the Help index under Image drive and path.
Barabara also showed how to add a picture box to any report form in order to view the image with the record.
The Help in DB/TextWorks is acually helpful. Searching for Image in the index should answer most questions about using images with the database.
At the end of the session Barbara showed how to make a simple lightbox for reducing the shadows and improving the quality of images when photographing small items. How to create an inexpensive photography lightbox and Do it yourself lightbox are two of the many articles available online on this topic.
Subscribe to:
Posts (Atom)