There is another way to create a link from the database record to an audio file on a computer so that when the link in the display form is clicked the audio file will play automatically. This method uses the UNC path to link to audio files and video files.
The initials UNC stand for Uniform Naming Convention. Instead of describing the location of a file or directory by drive letter, the Network Group will use a UNC path to describe the actual location of a file or directory. A UNC path is specific and applies to all operating systems.
Step 1
Locate the folder containing the audio files on the computer using My Computer or My Documents
 Click the folder using the right button on the mouse
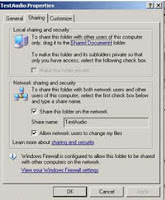
Click Sharing and Security
In Network Sharing and Security section

(Even though the computer may be stand alone this needs to be done)
Tick Share this folder on the network box
Enter the name of the folder to be shared eg TestAudio
Tick Allow network users to share my files
Click OK

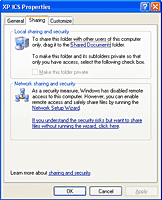
NB If the above options are not available and the screen looks like the one on the left, click the link in this section for information about understanding the risks of file sharing to enable this function.
If you only want to enable file sharing just choose the file sharing option instead of the Network Setup Wizard.
Once the sharing of files has been enabled repeat the above steps to enable the contents of the folder to be shared.
See How to configure file sharing on a Windows XP computer
Step 2
Either create a database for audio files or add an additional field to the data structure in an existing database to contain the UNC path.- When entering the filename in the record, the syntax to use is:
- Make sure that the field with the link appears in the Display report form.
- To listen to the audio file, click the link in the Display report form.
To locate the computer name:
- Locate the My Computer icon
- Click the My Computer icon using the right button on the mouse
- Click Properties
- Select Computer Name tab
To locate the exact UNC path for the folder:
- Click My Computer icon
- Click the My Network Places Link
- Click the required folder using the right button on the mouse
- Click Properties
NB: This method was tested using the Windows XP operating system.